
Your complete guide to the application at home, the best homekit technology and more
Homekit is Apple’s intelligent domestic system, which offers a platform for users of their iOS devices to take control of their connected home.
Actually, being a technician for a moment, Homekit is actually a software frame and a communication protocol developed by Apple, you will not see a homekit application on your iPhone or iPad.
On the other hand, everything is completely through the Apple start application, which is available on iPhone, iPad, Apple Watch, Homepod, Apple TV and Mac.
Homekit does not really require you to have a device or a central center to execute an intelligent home. All you need is an iPhone, iPad or Mac; Although adding a center like an Apple TV or a Homepod Mini will allow you to create a solid intelligent home such as a rock and help you open some excellent features.
Without a homekit hub configuration, you will not get access to things such as automatities, remote access and subprocess connectivity.
Next, we will explain the nuts and bolts behind Apple Homekit, how to start with the system and, crucially, be it the appropriate platform for your smart home.
What is Apple Homekit?
Apple Homekit is a baked platform in iOS to control your smart home. The idea is simple: instead of having a ton of different Smart Home applications on your phone that do not talk to each other, Homekit brings them together to everyone, offering control to the front and the center on their devices, as well as through Siri in its iPhone, iPad, Apple Watch, Homepod Mini and Mac Computer computer.
But that is just half of the story. There are two elements in Apple Homekit: Homekit itself is a standard: a background software technology that devices must meet to get access to the club. Then Apple Home is your user -oriented counterpart, an iOS application that you will find on iPhones, iPads, Apple TV, Mac watches and computers.
We are going to address all this as we advance. From compatible devices to the use of Apple TV as its homekit center, we will explain everything.
How does Homekit work?
To make an Apple Homekit intelligent home, you first need compatible devices. Some of those make, and you can start building your system.
In the first days, homekit devices were few and distant from each other, but Apple has expanded its scope and simplified its incorporation process and now there are hundreds of devices in almost all categories.
Most devices work through Wi-Fi or Bluetooth, but the introduction of Homepod Mini as a homekit center brought a third protocol to the party: thread, and this is also in the mixture for the last Apple TV and Homepod 2.
The thread standard promises to facilitate all kinds of devices, from lighting to thermostats, to work more easily together. And as it is a mesh network, it will also help your homekit devices to talk to each other in every corner of your home.
Apple is also an important player in Matter’s new Smart Home initiative and it is now possible to add even more devices to an Apple house using the subject, but more about that at one time.
That said, Homekit is still one of the most complicated smart house ecosystems for manufacturers to work with their technology, but much of that depends on the Super High Safety and Equipment standards of Apple. But while it is difficult for manufacturers, it is easy for users.
Most Homekit devices are added using the start application to scan a unique six -digit homekit code found in your compatible device or in your box or manual. (Be sure to keep those codes, you may need them later).

Once matched, the devices appear in the Apple Home application and can be assigned to rooms. You can also label them as favorites, which gives quick access to them when it opens the application, from the control center and also on the blocking screen if you wish.
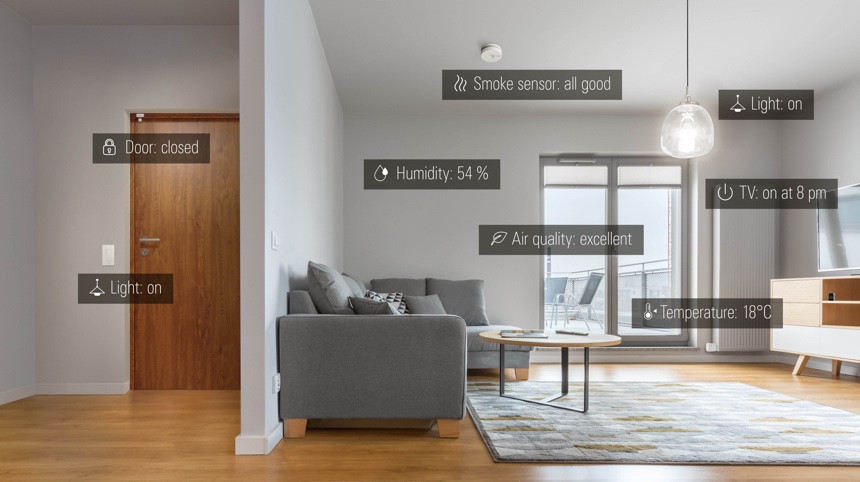
What you can do with each device in the start application depends on the category in which you are. The sensors will offer a live reading (the check of a door is closed, if the movement is detected, what is the temperature) and can turn on/off lights and plugs, block/unlock the doors directly from the control center.
Apple controls the capabilities of each device that adds, so all locks, lights and plugs of your door will work in the same way in the application (even if they have different characteristics in their own application).
There is an advantage in all this adjusted cupert control, security is quite bulletproof and those who wish to ensure that your intelligent home is protected from intrusion should definitely consider Homekit.

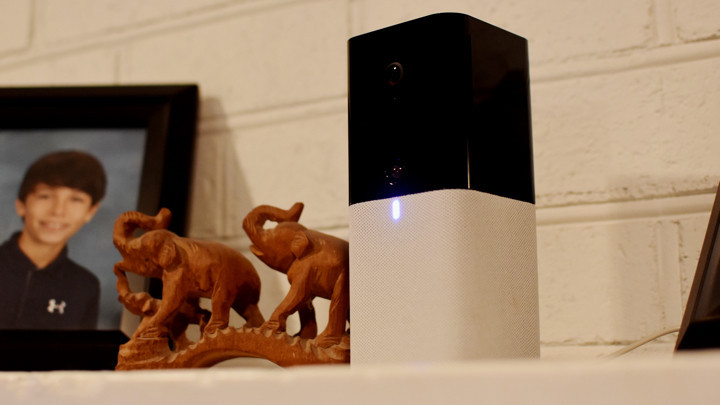
Homekit Safe video security cameras
Smart security cameras used to be an area where Apple was miles behind their rivals, but today there are dozens of security cameras compatible with Arlo, Netatmo, Logitech, Euphy and more. In addition, some of these work with Homekit Secure Video.
The function changes the way in which video cameras with homekit work, which makes not only a way of seeing live images, but also a way of storing images recorded as part of their ICloud plan. It also brings additional homekit features, such as intelligent alerts, facial recognition and activity areas.
The safe video brings the peace of mind that its footage will not be seen through the indiscreet eyes, since when the footage is captured, it is encrypted from end to end and then shoot the Icloud, where it will stay safely. Once there, only you and anyone who invites you to see can see it.
Read our Homekit Safe Video Guide for more information.
Using Apple Home application
When Homekit first launched, there was no application, instead used third -party manufacturers applications to configure each device. However, Apple soon saw the madness of its roads and launched an application to control them all.
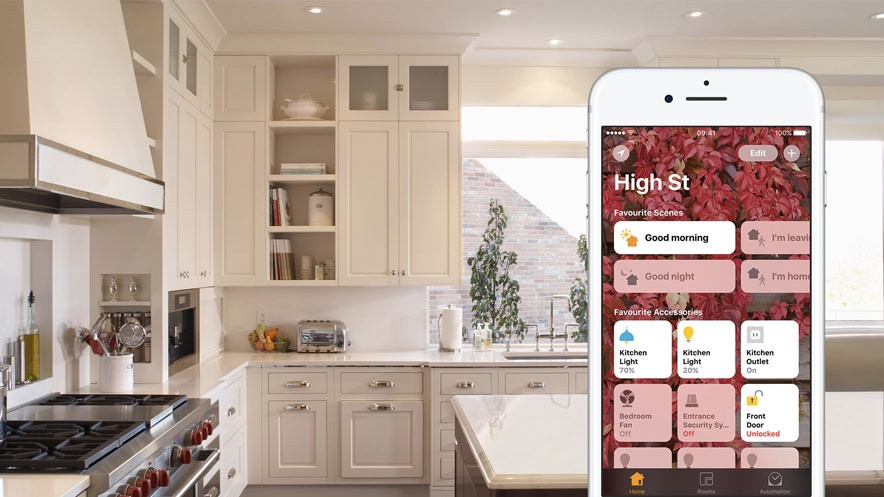
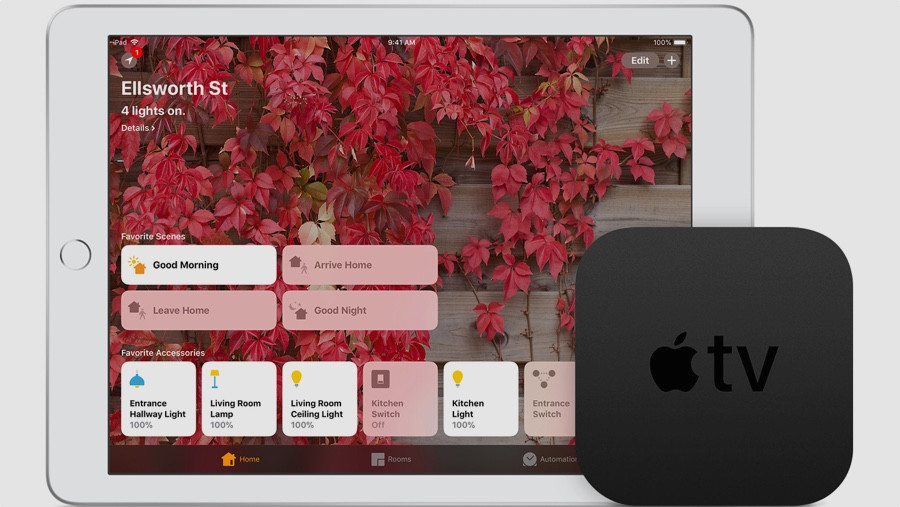
In the application it will open in ‘Home’, which shows all its favorite devices and their favorite scenes.
From there, you can deepen specific rooms, which groups devices depending on which room they are.
Next, there is ‘automation’, which allows you to automate how your smart home reacts to things. For example, the lights may go out when I get out of the house, or place the front door so that it is blocked at night.
In the application you can also activate notifications for any doors, locks and sensors in your homekit home, a kind of de facto security system. The application is also where you will add any accessory and configure scenes and automation (more about that below).
If you are not a fan of the start application, curiously you can use third -party applications. Eve is very good, Fibaro also has one, and there are a series of payments in the App Store. The advantage of these is that you can get a little more control over some of your home’s devices, but they are also more complicated than the start application.
One of the best characteristics of the Apple Home application is the ability to create scenes; Essentially device groups, which can be controlled at once (think of “sleeping time” or “film mode”). The scenes can be controlled with a voice with Siri, by touch in the application on your phone or clock, or activating another device, such as an intelligent start button.
Press the symbol more in the upper right and choose Add scene. Choose devices you want to control by touching Add accessories And then name the scene before pressing Made.
Along the same lines, automation allow you to automate the behavior of a lot of connected devices that depend on factors such as the time of day or its location (depending on the house state / absent of your iPhone), when a sensor detects something (movement or smoke), and / or when another device is controlled (such as a locked door). The different between scenes and automation is that the scenes require that you activate them by voice or touch; Automation occurs automatically.
The only exception is that automizations can also activate scenes. Therefore, you can establish an automation that triggers your “good night” scene to turn off the smart lights, lower heat and block the doors at 10:30 pm every night.
For a deeper immersion in Homekit’s scenes and automatities, read our guide on how to configure these super useful smart household assistants.
Controlling elements of your home by voice is a really natural interface. What is the point of an smart bulb if you can only turn it on with your phone?
Apple’s smart homer extends in Siri (no Alexa or Google assistant here). The voice assistant is integrated into the iPhone, Mac, Apple Watch, Apple TV and Homepod, which means that a Siri device is probably never far away.
Complete all your intelligent starting devices with your voice and have simple and complicated tasks. These are some of the best uses for Siri in their smart home (all of which begin with A, “Hey, Siri …”).
“Turn on the lights” or “turn off the lights.”
“DIM LUCES” or “Establish the brightness at 50%.”
“Set the temperature in 68 degrees.”
“Light the coffee maker”.
“Turn on the lights above.”
“Dim 50%dining rooms.”
“Make the lights of the living room the brightest.”
“Set the thermostat below 70”.
“Set my bed of bedtime.”
“Open the garage door.”
“Close the main door”.
“Is the bedroom window open?”
Once your homekit house is configured, you may want to pay control of other people from your devices. Apple facilitates sharing its configuration with any person, so that their spouse, son, fourth or nanny partner can turn on the lights and establish heating at their favorite temperature.
Touch the icon more in the upper right corner of the Apple Home application and choose Add people. Select a contact from the list and then press Send invitation. They will have to have an Icloud account. When they accept, your Apple Home application will be populated with all your devices.
It can have more than one home in the start application, so if they have their own, they can change between the two (or, useful, let Apple do it for them based on geolocation).
There are also exciting news for those who use the Apple Home application for their security systems or smart locks: a new set of access controls of guests with iOS 18 has been introduced.
These tools allow you to create custom permits for specific devices, such as your smart block or garage door, as well as control your safety system. You can give access through key home technology or configure schedules that allow guests to access certain devices only during specified times of the day.

If you are at home on your iPhone, your homekit kit will work without a center, but for any access or remote control, you will need an always present device, Wi-Fi enabled and enabled at home. The good news is that Apple’s smart house configuration takes advantage of an Apple TV or Homepod as a secret home Smart Home center, so there is no need for another plastic box.
He used to use an iPad as a domestic center, but Apple canned this in 2023.
You will have to have a homekit there if you want to use automatities or see live camera broadcasts in the start application, because the HUB performs all the processing of these systems locally on the device (it does not use the cloud).
Finally, you may want more than one center. There is no damage to enable all the compatible devices that have the home centers.
With multiple configured centers, the main starting center will be shown as connected and the other starting centers will show as their status. They will take care of remote access if the main start center is disconnected, they will also act as a Bluetooth extensor for devices farther from the main center, very useful in larger houses.
This is also where thread and matter will come into play. Thread is a mesh network, which means that you can connect all its devices together on a giant mesh, which helps extend connectivity throughout your home.
The good news, and a very desired feature, is that choosing a homekit would have preferred in the home application will arrive with iOS 18.
Configure Apple TV as a home center
A 4K Apple TV is a great solution for a center because it is always plugged in and is an excellent video transmission device, in addition to its remote control has incorporated Siri, so you can ask you to operate your starting devices without having to find your phone.
For configuration, Apple and Iloud help with most of the heavy work here, but here we show you how to add an Apple TV to your homekit house.
1. On your iOS device, enable the authentication of two factors for your Apple ID. Go to the ICloud settings and make sure the keychain access is enabled. It should be.
2. It must be signed in the same Icloud account on Apple TV (Configuration> Accounts to verify).
3. Icloud must do the rest but can go to Configuration> Accounts> ICloud To verify if Homekit is connected. You can also verify the status of the starting centers (Apple TV or an iPad) playing in the right corner of the Apple Home App screen and looking under the starting centers.
It is worth noting that not all Apple TV models are the same when it comes to their intelligent home hub capabilities.
The last 128 GB model is a matter controller and a thread edge router: the 64 GB version lacks thread. However, the 2021 model also includes both, so it is possible that you do not need to update.
Configure Homepod as a house center
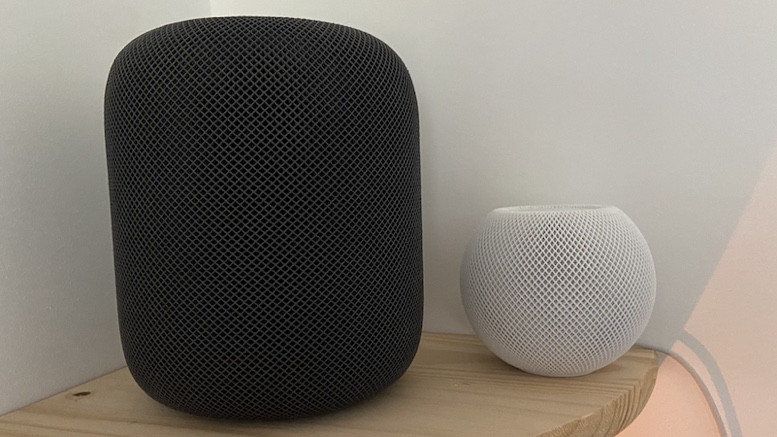
Apple’s smart speakers, the original Homepod (now discontinued), Homepod 2 and Homepod Mini, can also act as their homekit hub and, such as the Apple TV option, it makes a lot of sense to use it, since it is likely to be static in your home and feed on all the time.
Like Apple TV, homekit hub setting in Homepod is an automatic matter, just be sure to enable two factors for your Apple ID, approved access to the keychain and signed in the same ICLOUD account.
You will see its Apple Homekit centers listed in the start application, and the application will also tell you which one you are using.
The Homepod Mini and Homepod 2 also pack on a thread radio.
Use your homekit hub as a matter controller
We have mentioned the subject several times and the good news is that, if you already have a homekit hub settings as described above, you are ready to start adding subject devices to your Apple’s home.
Both generation nicknames, Homepod Mini and Apple TV 4K (models 2021 and 2022) are capable matter controllers.
If you want to add a subject on the sub -process device to your Apple’s house, that subject controller also needs to double as a subprocess edge router.
There are currently four options for that scenario: Homepod of second generation, Homepod Mini, 2021 Apple TV 4K and the 128 GB version of 2022 Apple TV 4K.
Homekit’s new architecture
You may have read about Homekit’s new architecture and wonder exactly what it is.
The long short story is that, in 2022, Apple updated the Back-End of the Apple Home system, to create a more stable and receptive experience of Apple’s home system, especially for houses with a large number of connected devices.
For users, there is not much to worry here. In addition to the fact that you can no longer use an iPad as a domestic center, all changes are in the background.
However, in March 2025, the reports distributed that the new architecture, which had been an optional update, would become mandatory for iOS 18.4 and from now on.
So, if you haven’t done so, be sure to update your Architecture Apple Homekit.
Matter moves for iOS 18
Apple iOS 18 update will optimize even more homekit, which will allow you to connect to Wi-Fi matter devices without additional applications or hardware.
If you have an iPhone with a thread radio, such as the iphone 15 Pro or newer, you can control the subprocess devices directly. This update makes the administration of intelligent domestic devices through the Apple ecosystem much easier.
Before this, the configuration of a matter device in the start application required a center, such as Apple TV 4K or Homepod, even if the thread was not involved. Without one, I would need to install a third -party application and create an account.
The iOS 18 update eliminates these additional steps, saving time and storage of the phone. To control matter devices without a center, you will need an iPhone 15 Pro or newer and more compatible devices that take advantage of this new feature
Is Homekit suitable for you?
Obviously, Homekit is suitable for you if you use an iPhone (it will not work with Android phones), and somehow is left behind Alexa and Google Assistant, mainly in terms of compatible devices and Siri’s own intelligence as an assistant.
However, thanks to Apple making a key change in allowing manufacturers to make their devices friendly with the home with a software change instead of a chip, and the arrival of the matter, we are beginning to see that more friendly devices with the home reach the market.
Usability has greatly improved over time, and the start application is a very powerful smart house manager, which gives you many more control and automation options that Alexa. In general, Homekit is more with an intelligent domestic system like smartthings, although he still needs work.
However, Homekit is very safe and once configured it is a fairly bulletproof platform that, thanks to being locally controlled and not dependent on the cloud, rarely suffers from falling connections or temperamental hardware.
Siri Control is the cake of the cake. As long as you have an iPhone, Apple Watch or Homepod Mini at hand, you always have instant control over your scenes and devices.
Apple Homekit: More tips and tricks
Put your Minis and Apple TV of Homepod to work
Thanks to a recent update, you can now add Homepod and Apple TV to automation and scenes, so you can start playing music when you open the main door or that Apple TV shoots Netflix as part of its Netflix and Chill scene.
Use Spotify in Homepod
Finally, you can now take advantage of Spotify through its Homepod as AirPlay 2 speaker and even use several room audio. Check out our guide to discover how.
Use the start application for macOS
The Apple start application for macos allows you to catch up with what is happening in your home and control essential devices directly from your desk.
The shortcuts bring more fun
Homekit has been integrated with Apple’s shortcuts so you can link your phone’s functions to your home. For example, you can turn on the lights when the alarm turns off, or integrates Apple’s carplay into the automation of your home.
Make your smartest intelligent TV
Select intelligent TV models from LG, Roku, Samsung, Vizio and others are now compatible with Homekit. This means that the TV is shown in its start application as a device and can be controlled from there: activate or disable it, control the volume and change the HDMI inputs. You can also use Siri to control the TV, in addition to adding it to scenes and automation, as well as using your iPhone control center as a TV remote control.
Add Homepod to Sonos
Sonos and Homepod finally work together, so they can take advantage of multiple rooms without investing in a completely new configuration. Check out our guide to work.
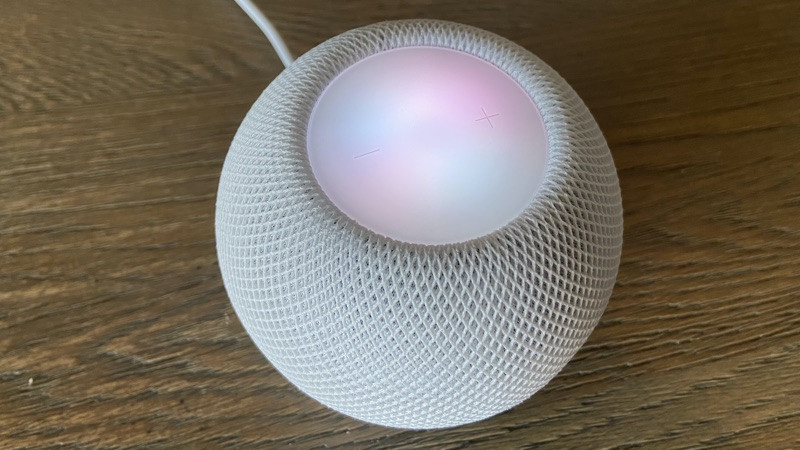
Control your homepod mini with your iPhone
Homepod Mini is mainly controlled through Siri, but for those uncomfortable moments, its iPhone can also play a crucial role to stop, start, pause and control the volume.
Better Homekit Compatible Devices
There are some fantastic options when it comes to choosing the best intelligent starting devices to work within the Apple ecosystem.
Promoted by a large number of new devices (thanks to the change of the Cupertino company of its previous and limiting hardware requirements), an affordable intelligent speaker in the Homepod Mini and the compatibility of the matter, Homekit is on a streak.
These are some of our favorite homekit compatible gadgets.
Philips tone
Hue and Homekit work together without problems. All egg lighting products will appear in the application of their home, as long as they are connected to their hue bridge. Once matched, you can control your lights with your voice and add them to Homekit Automations. And because communication is from bridge to bridge, everything is made locally, there are no clouds involved, which makes it super agile.
Hue also works with homekit adaptive lighting. This is a characteristic that can change the color temperature of intelligent lighting at different times of the day, emitting warmer colors in the morning, the coldest in the middle of the day to help it energize it, and at night it automatically reduces the light to help it down.
Ecobee smart thermostats
Ecobee’s intelligent thermostat range uses Homekit for Max, not only allows you to control the heating remotely, but also allows you to take advantage of the geofencing of the platform, the triggers, the scenes, and a whole range of home -based functions. You can even use Ecobee’s remote sensors as triggers for homekit automation.
Eve
EVE has been dedicated to creating devices for Apple Homekit and its application is an excellent option to use instead of Apple’s beginning, since it offers some more advanced features and allows you to create more complicated automation.
The Eve range is one of the most complete in the Homekit market, including movement sensors, security cameras, door/window sensors, temperature sensors, plugs, radiator valves and light switches. In addition, Eve has pledged to transition from all its products compatible to threads, which means that it will work without problems with your Apple Homepod Mini.
Nanoleof Essentials + Panels
The essential Nanoleof line is an excellent option for Homekit.
Intelligent led lights in full color, both have built -in thread connectivity, so there is no need for a center and there is no wifi need. The subprocess radio makes these lighting options an excellent option if you have a Homepod Mini, since they respond almost instantly to any home or Siri commands. Nanolef’s light panels also work with Homekit and Hild will also reach those who soon.
August Wifi Smart Lock
August Wifi Smart Lock is a completely redesigned version of his iconic intelligent block. With almost half of the size and 20% thinner, it still has the exclusive automatic graft function of August and, of course, admits homekit so you can add the blockage to automation and use Siri to block or unlock with your voice.
This blockage adheres to its existing bolt, which makes the installation easy. And despite its smallest size, the blockade includes an additional feature: integrated Wi -Fi, so there is no need for an additional bridge or an intelligent domestic center to control it when it is away.
View of the Logitech circle
Logitech Circle View comes with Homekit Secure Video and was the first interior/exterior camera to do so. HSV’s benefit is that encryption occurs in the Local device Before being sent to the cloud, which means that Apple can’t enter it, even if you wanted to.
It also obtains all HSV functions, including live transmission of 1080p HD, accessible videos for 10 days, movement alerts (including intelligent people, animal alerts and vehicles), customizable movement areas, bidirectional audio and rich notifications.
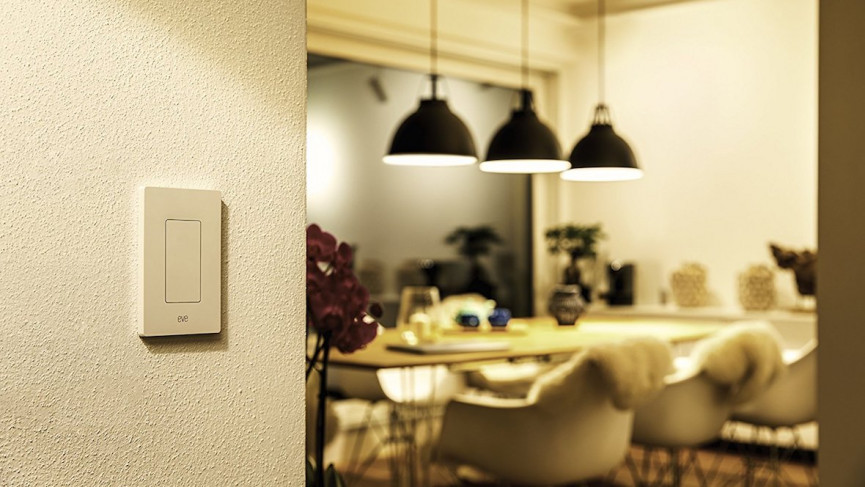
Lutron Caseta Dimmer
This attenuation switch for Homekit allows you to chat with Siri to control your smart bulbs, and we believe it is one of the best attenuation switches that exist.
In addition, its remote peak that accompanies can be programmed to activate scenes and act as a second wall switch. You will need the cassette bridge to connect to Homekit (you can buy it included with a switch for less than $ 100), but once you are hooked, you can create scenes and schedules, as well as configure geofencing for when you leave and enter the house.
Wemo Wifi Smart Plug
The successor of Wemo Mini, the Wemo Wifi Smart Plug also works with Homekit and is even more compact than its predecessor, 45% Mini-Er, says Belkin.
Naturally, you can control your device from anywhere and even use your voice assistant (admit the three) if you do not want to take that start application. Collect a pack of 3 for $ 50 An. Obtain automation.
Fibaro Movement Sensor
Looking very similar to the Sauron eye, the fibaro superior movement sensor detects the movement and bends as a temperature sensor. It is also Teeny Tiny, which facilitates installation anywhere where you need to detect some movement. Paste one next to your bed and make the lights come on when your feet hit the floor.
With Homekit, alerts may appear on your iPhone when the movement is detected and can also integrate movement detection into Homekit automation.
MyQ garage per controller
Hi Siri, opens the garage door. “With the MYQ Garage Door controller connected to his existing garage door starter, he can say that those six magical words and life will seem much simpler.
Yes, you can use the remote control in your visor, but this is simply fresher, in addition, you can verify the status of your door from anywhere and even make Homekit close the door automatically to move away. For Homekit compatibility, you must buy the MyQ Home bridge, which at $ 69 costs more than the controller.
Smart security dwelling
With Homekit Integration, you can control this DIY SECURITY SYSTEM completely through the start application, including automation and geofencing configuration for arms and disassembly, and watch video (although there is no safe homekit video).
All your purple movement sensors, windows and doors and doors will appear in Homekit, which will allow you to use them to activate automation and scenes. You can also use Siri for voice control. However, the professional monitoring part is only done through the Morby application.
Everything else
Actually, you can keep up with each device that is compatible with Apple Home using this practice reference that Apple keeps updated.
")


